- 10 Steps To Follow For Preparing Your Camping Gear
- Step 1: Make Your Reservations Now For The Campground Of Your Choice
- Step 2: Check Your Shelter For Leaks, Tears Or Broken Straps
- Step 3: Clean Your Sleeping Bag and Sleeping Pad
- Step 4: Inspect Your Cooking Equipment
- Step 5: Look Over Your Eating Utensils
- Step 6: Restock Your First Aid Kit
- Step 7: Prepare Your Fishing Equipment
- Step 8: Go Over Your Motor Home, RV And Trailers
- Check Your Wheel Bearings
- Step 9: Check Over Your Pickup Camper
- Step 10: Prepare Your Towing Vehicle
- To Sum It Up
- Please Leave Comments or Ask Questions About Preparing Your Camping Gear For The Upcoming Season Below
Preparing your camping gear for the upcoming season along with making reservations, should begin now.

Arriving at your campsite you shouldn’t see a tear in your tent or that your camp stove isn’t working.
You don’t want to find out after arriving that there is a leak in your motor home, camper or travel trailer.
Everyone should be able to enjoy their camping trip without worrying about righting a wrong.
Preparing your camping gear a head of time puts you out front of any problems.
Therefore any issues that may arise on site will be minor.
Most of all, after you set up camp you have the time now to relax instead of doing a repair.
Dig out your camping check list and start to work your way down the list.
Place a check mark beside each item that is working or in stock.
Repair those that need it or replace as necessary.
If you don’t have a camping check list you can download our pdf or word doc for free and print as many copies as you need.
Follow through our 10 steps (not necessarily in this order) below to make sure all your camping equipment and supplies are in working order or in stock before you get to the camping season.
Preparing your camping gear now will save valuable time for the activities you want to do when you get to the campsite.
10 Steps To Follow For Preparing Your Camping Gear
Step 1: Make Your Reservations Now For The Campground Of Your Choice
January and February is the time to make reservations for the campsite you are wanting to visit if that campground requires a reservation. Especially in a heavily populated area where campers reserve early to get the best spots.
National, Provincial, State or Federal campgrounds and parks usually require a reservation due to the popularity and high demand. In British Columbia, you can reserve your campsite here for BC Parks.
If you haven’t made a reservation, try to anyways in case there was a last minute cancellation. It never hurts to try and sometimes you get lucky. At the very least you can leave your contact information in case one becomes available. This means you’ll have to be flexible with your dates.
Even if you are not going to a campground that needs to be reserved, you should do some research on how popular it is. Taking a chance could mean some extra driving trying to find a campsite with room if you don’t do your due diligence before you arrive.
Step 2: Check Your Shelter For Leaks, Tears Or Broken Straps
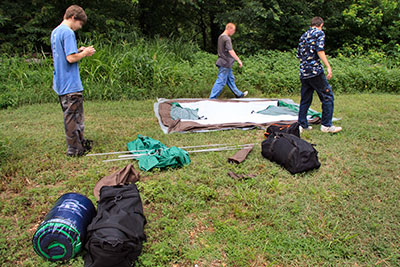
Pull out your tent from storage and go over it for any mold, rips, tears, or broken straps. It is especially important to set up your tent to fully view all parts of it and let it air out. Hopefully when you put it away you let it dry out first so there will be no mold or mildew.
If you find mold or mildew, use a soft brush or toothbrush to scrape it off of your tent or other moldy materials. Wash the affected areas with a mixed solution of 1/2 cup Lysol and 1 gallon of hot water. Rinse with a solution combination of 1 cup lemon juice, 1 cup salt and 1 gallon of hot water.Hang until dry.
After the tent or material is dry you are ready to bleach the mildew stain. Depending on the material, you can use a non-chlorinated bleach to wash the mildew stain. Use the rinsing solution given above for colored materials.
For color safe materials, try 2 tbsp’s bleach to 1 quart water. Allow all materials to dry thoroughly.
Check all your poles for any bends, cracks, or other issues that will impair the structure of the shelter. Your local outdoor store will carry a tent pole repair kit. When in a pinch you can use some electrical tape and a splint made out of wood or a tent stake to get you through. Make sure all your tent stakes are present and in good condition. Extras can also be purchased at your local outdoor store.
Step 3: Clean Your Sleeping Bag and Sleeping Pad
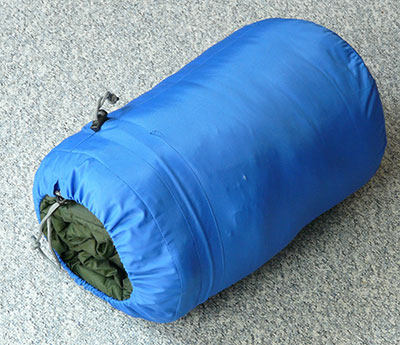
Unroll your sleeping bag and look it over for dirt, mildew and mold. Check the zippers to ensure they are still moving freely. If your sleeping bag is dirty and needs a good washing than wash with a mild detergent.
Most outdoor stores offer a special soap for this purpose. Set the washing cycle to gentle on your machine. Let your sleeping bag air dry for best results.
If your sleeping pad is an inflatable one, check to see if it holds air. If not, use a patch kit (also available at outdoor stores) to repair the leak. A quick fix is to use duct tape to repair the area until you are able to purchase a new one.
Check your non inflatable sleeping pad for rips, tears or pieces missing and replace as necessary. Furthermore ensure that it is still maintaining its shape for a comfortable sleep.
Step 4: Inspect Your Cooking Equipment
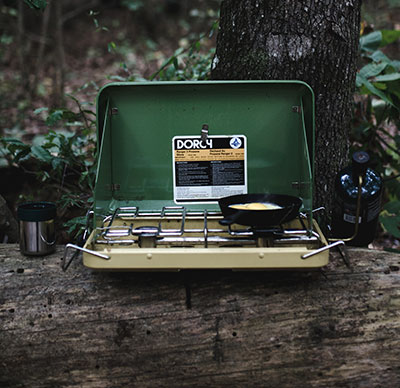
When preparing your camping gear, it is especially important to inspect your cooking equipment. If you use a fuel based cooking stove, you must make sure everything is working properly.
Check your fuel containers to ensure there is sufficient fuel for your inspection. Make sure the control knob is turned off .
Use a solution of 1 part dish soap and 3 parts water to check for leaks at every fitting.
Turn on your fuel control knob and leave on for only 10 seconds. Spray solution on all fittings and look for bubbles to indicate a leak. If bubbles appear than tighten or replace fitting (or O ring) and start over.
Step 5: Look Over Your Eating Utensils
Make sure all your eating utensils are clean and numerous for the size of your group. When you find a broken or chipped utensil, replace or repair as necessary. Double check to see that you have everything you need for eating and cooking your meals.
Step 6: Restock Your First Aid Kit
A very important criteria of any outdoor adventure is having a good first aid kit. Equipping your first aid kit with the right safety items is a must.
Here is a short list of ideas for your first aid kit:
Step 7: Prepare Your Fishing Equipment
Dig out all your fishing equipment including tackle, safety gear, boats, motors etc to go over and fix or replace as needed. If you’ve winterized all your gear than this won’t take long. If not, than you need to change the way you store your equipment every winter in order to prolong the life and make your chores easier in the spring.
Clean your reels and fly fishing lines if needed. Check over all the eyes on your fishing rods for nicks in the porcelain or damage to the thread that holds the feet onto the rod. Re-spool old mono filament fishing line for a better experience when out on the water.
The same thing applies to your boats and motors to ensure a fun and anxiety free first outing. Check your fuel tanks, fuel lines and fuel to make sure there are no leaks or bad fuel.
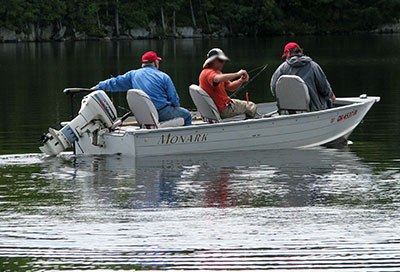
Fire up your motor using a garbage pail or motor ears with a garden hose. Make sure it idles correctly and there is no misses at a higher rpm. Pull the drain plug in your lower gear case to check the oil. Look for any discoloration or water and replace as necessary.
Pull off the propeller and look for fishing line or a cracked seal. Make sure your propeller doesn’t have any chips or bends and fix as necessary.
After all, when you arrive at your destination you should only have to set up camp and then launch the boat and go fishing.
Step 8: Go Over Your Motor Home, RV And Trailers
The Dreaded Water Leak
If you are a camper who is fortunate to have a motor home, pickup camper or travel trailer, than you should run a series of checks for issues.
The most important being water leaks from sitting all winter. The temperature changes can wreak havoc on older caulked seams.
Go over all your windows, vents and anything else that may be attached to the unit.
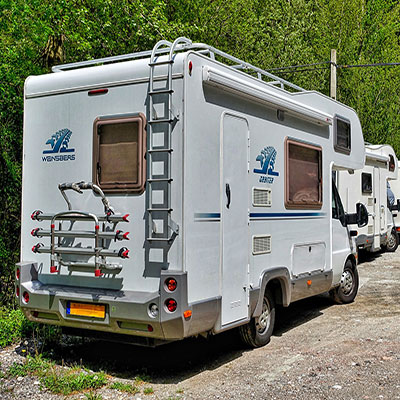
Your Tires Carry The Weight
Have a look at your tires to see if there are any cracks on the sidewalls or in between the treads. Check the tire pressure and adjust as necessary. The psi rating for the tire should be written along the tire bead next to the rim. You can also find it in your manual.
Don’t forget to look in on your spare also in case you strike a sharp rock that punctures a tire.
While you’re at it, make sure your jack and tire removal tools are all there and in good condition. In addition, make sure to pack along a tire repair kit in case you have to apply a quick fix to get you to a tire repair station.
Check Your Wheel Bearings
If you know what you’re doing you can remove the dust cap on the axles to check the bearings for grease. Look for a lack of grease, burnt smell or evidence of water.
Re-pack if necessary with the proper grease (usually a marine grease). If you don’t know what you’re doing here than it is best to let your mechanic go over everything.
Step 9: Check Over Your Pickup Camper
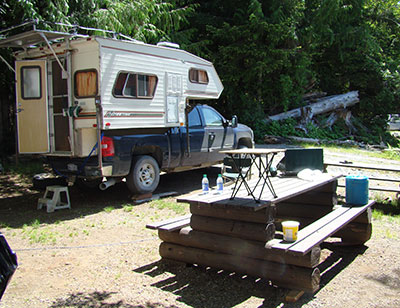
Maintain Your Camper Jacks And Tie Downs
Preparing your camping gear not only applies to the obvious items but should also include the tools that store your camper.
Every outdoors person who owns a pickup camper should be using camper jacks to store their camper on during the off season. These jacks can sometimes begin to leak over time and if so, make sure to top up the oil and replace the seals around the plug.
Make sure all your camper tie downs and turnbuckles are present and accounted for. Also ensure that they are free of rust or corrosion and function as they are supposed to. Double check the anchor points on your truck for any excessive movement or broken parts. This is critical for a safe drive down the road while the camper is attached to your pickup.
After you are comfortable with camper jacks and accessories that complete the system it is time to check inside the camper for other issues. Do a check around the windows and roof vents to ensure there are no leaks or cracks in the sealant.
Look for water stains in the areas that are not visible immediately, like under the corner of the mattress.
Your Campers Umbilical Cord
Have a look at the electrical pigtail from your camper that connects to your pickup for all your running lights and 12 volt power. Make sure there is no corrosion or broken wires that will cause you problems down the road.
If you’ve wired it your self, unwrap the electricians tape or shrink wrap and re-do all the connections using electrical grease. Over time the constant changing temperatures will corrode or eliminate the previous corrosion inhibitor and will cause issues out on the open road.
Take Care Of Your Pickup Box
If you use a bed mat for the lining of your pickup box to mitigate the movement and damage to your box or box liner, check for rips or tears. This will stop any water from building up under the mat and rusting your box or staining your box liner.
The Heart Of Your Camper
Flush all the winterizing fluids from your water system and check all fittings and pumps for wear or leaks. Double check your toilet and shower to ensure everything is functional and in good shape.
Go over your propane lines and appliance fittings to make sure there are no leaks or corrosion present. Clean out all the cobwebs, pine needles or other dirt that has settled over the winter in the back of your furnace or refrigerator. This could lead to a lack of ignition when present.
Step 10: Prepare Your Towing Vehicle
Last but not least is the vehicle you use to tow your trailer, place your camper on, or just camp in if you’re car camping.
Make sure that all the brakes are in good working order and the tow package is still performing as it should be. Are all your tires, shocks, exhaust and drive train up to par so there will be no surprises when travelling over that gravel road you discovered was part of the journey.
Never take for granted that your vehicle will perform as requested. You should always make sure you follow a regular maintenance routine for all your vehicles. This will guarantee there will be no surprises when travelling with your family and or friends.
To Sum It Up
In conclusion when preparing your camping gear for the upcoming season it is imperative that you go over everything that you need to make your camping trip a successful and enjoyable one.
Don’t settle for fine, you want to eliminate all the potential problems that could occur if something isn’t as it should be with your camping gear.
After all if you’re constantly fixing or changing things in the field, your camping trip will not be as relaxing as it was supposed to be.
Please Leave Comments or Ask Questions About Preparing Your Camping Gear For The Upcoming Season Below
Don’t be shy, please leave us some comments good or bad it doesn’t matter as we love hearing from you regarding our website, articles and what you’d like us to do to make this website better suited for your needs.
We’ll always reply with 48 hours to your comments or questions. Please be courteous and polite though even if you disagree with something as no one likes a bully.
Also don’t forget to share and like us with your favorite social media site using the buttons below so we can get the word out there about the beautiful camping opportunities that exist on Vancouver Island.

Thanks for the tip about checking your tent for holes or tears and if the poles have any bends or cracks before going camping. I went and looked at our tent and found it has scratches from our cat and that the poles were broken. It was an old one my parents used to use, so I guess now we’ll have to go buy another one before we go camping this summer.
Hazel, sorry we missed this comment.
You’re very welcome for the tip and hopefully you found another tent for the summer.
Have fun this summer and be safe.